
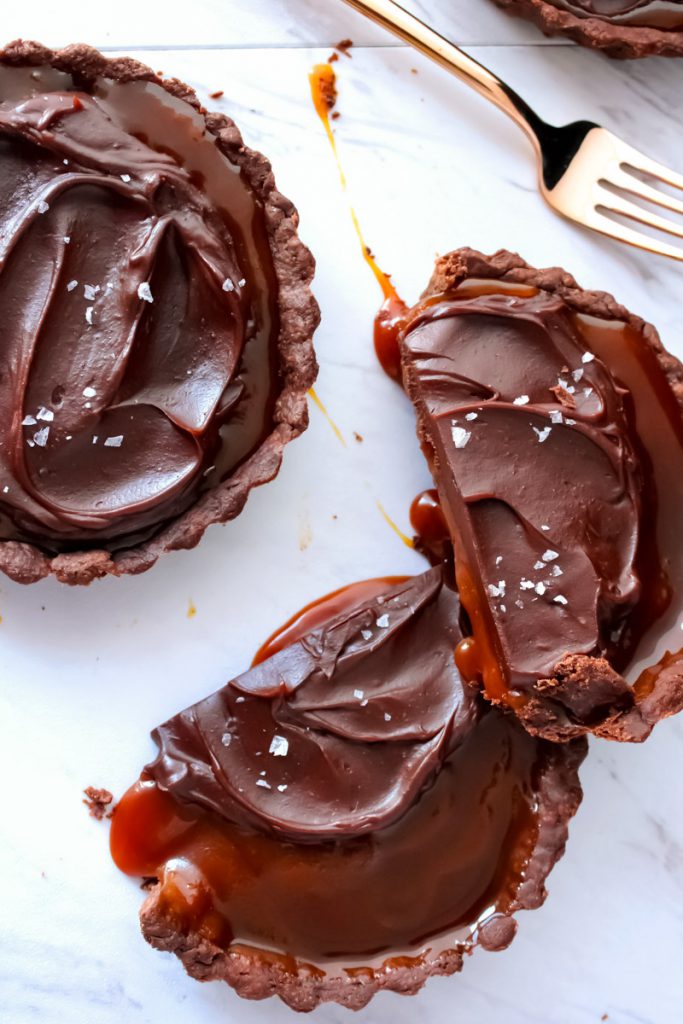
These salted caramel chocolate tarts are seriously incredible. When my husband asked incredulously, ‘Did you really make these?’, I knew I had a winner.
These tarts are as good as they look. Salted gooey caramel underneath creamy, chocolate ganache. Underneath, there’s a crunchy chocolate crust, kind of like a 5-star candy bar.

As much as people love chocolate, I’m learning that people are magnetically drawn to salted caramel. There’s something about the combination of salty, sweet, and buttery that drives people wild.
I have to admit that salted caramel does not need chocolate, but when you marry the two together, it elevates it to a dinner party worthy status. The bittersweet of the chocolate and caramel is perfection, and the chocolate crust rounds out the experience with a needed bit of contrast.
How to Make Chocolate Caramel Tarts
While this recipe appears at first glance to be complicated, each phase is straightforward but requires a little planning ahead. After what I consider to be 3 phases, you get to do the best part: assemble the tarts. While making the crust, you will have down time to make the salted caramel and ganache.
- Form cocoa crust in tart pans, freeze, blind bake and bake again
- Simmer caramel sauce, cool, add to tart crust, and refrigerate
- Warm chocolate in double boiler to make chocolate ganache
When you are ready to assemble the tarts, you will simply pour caramel into the shells and refrigerate for 1 hour to set the caramel. After this, you’ll be able to more easily remove the tart tins (mine have removable bottoms) because the caramel will allow you to press against the bottom without breaking the crust.
Making the Chocolate Crust
I enjoyed making this chocolate crust because it’s not your typical crust and adds a level of drama to an already luxurious dessert.
While I use mini-tarts, you can use a large 9 or 10″ tart pan (with removable bottom). To do this, add 5 minutes for the blind-bake and another 5 minutes after removing your pie crust weights.
Chocolate Crust Tips
- Refrigerate the tarts before baking so that your crust firms into place.
- You can make the crust dough ahead of time or multi-task with the caramel while your dough is setting in the fridge.
- One thing I like about this cocoa crust is how easy it is to work with. Unlike a traditional pie crust (as in this peach cobbler skillet), you can handle this dough with your hands and work it a bit more.
- Pastry is prone to tearing the warmer it gets. You can move the dough into the refrigerator as you work to keep the dough together.
Did you make this chocolate tart recipe? I’d love to hear how you got on in the comments below!
Salted Caramel Chocolate Tarts
Ingredients
Crust
- 1/3 cup cocoa powder
- 2 T sugar
- 1/2 teaspoon kosher salt
- 1 2/3 cups all-purpose flour plus more for sprinkling
- 3/4 cup chilled unsalted butter 1 1/2 sticks cut into 1-inch pieces
- 1 large egg yolk
- 3 T chilled water or milk
Salted Caramel Filling (Yield: 1 1/2 cups)
- 1 1/2 cups sugar
- 1/8 teaspoon cream of tartar
- 6 T chilled unsalted butter cut into 1-inch pieces
- 1/3 cup heavy cream
- 1 teaspoon kosher salt
Ganache and Assembly
- 4 oz bittersweet chocolate finely chopped
- 1/2 cup heavy cream
- 2 T unsalted butter cut into small pieces
- 1 pinch Flaky sea salt Maldon or similar
Instructions
CRUST
- Whisk cocoa, sugar, salt, and flour in a medium bowl. Add butter and use fingers to smash butter into dry ingredients until no chunks remain and you have a mixture that holds together when squeezed--it's ok to work more than pie dough.
- Make a well in the center and add egg yolk and water. Using a fork, gradually incorporate to form a shaggy dough. Knead a couple of times in bowl until smooth. Flatten into a disk and wrap tightly with plastic wrap. Refrigerate dough for 2 hours until firm. Meanwhile, make the caramel.
- Preheat oven to 350°. Unwrap dough and lightly sprinkle both sides with flour. I recommend rolling dough until 1/8" thick between 2 sheets of parchment paper to prevent sticking. Use a single tart pan or cut smaller pieces to fit into individual tart pans so that the dough gently slumps over the edges. Use a straight-sided measuring cup to press dough into the corners and shape into grooves. Roll pin over top edges of pan to remove excess dough. Prick bottom of dough with fork and freeze until very firm, 15 minutes.
- Transfer tarts to a rimmed baking sheet. Add parchment paper to each tart with pie weights (beans or rice). Bake 10 minutes for small tarts (12-15 minutes for 1 10-in tart) until edges are set and starting to look dry. Remove parchment and weights. Bake for another 15 minutes for small tarts (18-22 minutes for 1 10-inch tart) until firm and dry all over. Transfer to a wire rack to cool.
SALTED CARAMEL
- Bring sugar, cream of tartar, and 1/3 cup water to a boil in a large pot over medium-low heat. Cook, swirling often but not stirring until caramel is deep amber, 8-10 minutes. Remove from heat and carefully stir in butter a piece at a time until smooth. Gradually stir in cream and add salt. Transfer to a glass measuring cup for easy pouring (allow to cool before adding to tart crust).
GANACHE AND ASSEMBLY
- Place chocolate, cream, and butter in a heatproof bowl set over a saucepan of simmering water (do not let bowl touch water). Stir with a spatula until ganache is smooth, 5 minutes. Let cool until it begins to thicken enough to hold an indentation from a spoon.
- To assemble the tarts, pour caramel sauce into each tart crust and refrigerate until caramel is set, at least 1 hour. Carefully remove tart tins by pressing gently against the bottom while pressing down on the top edge.
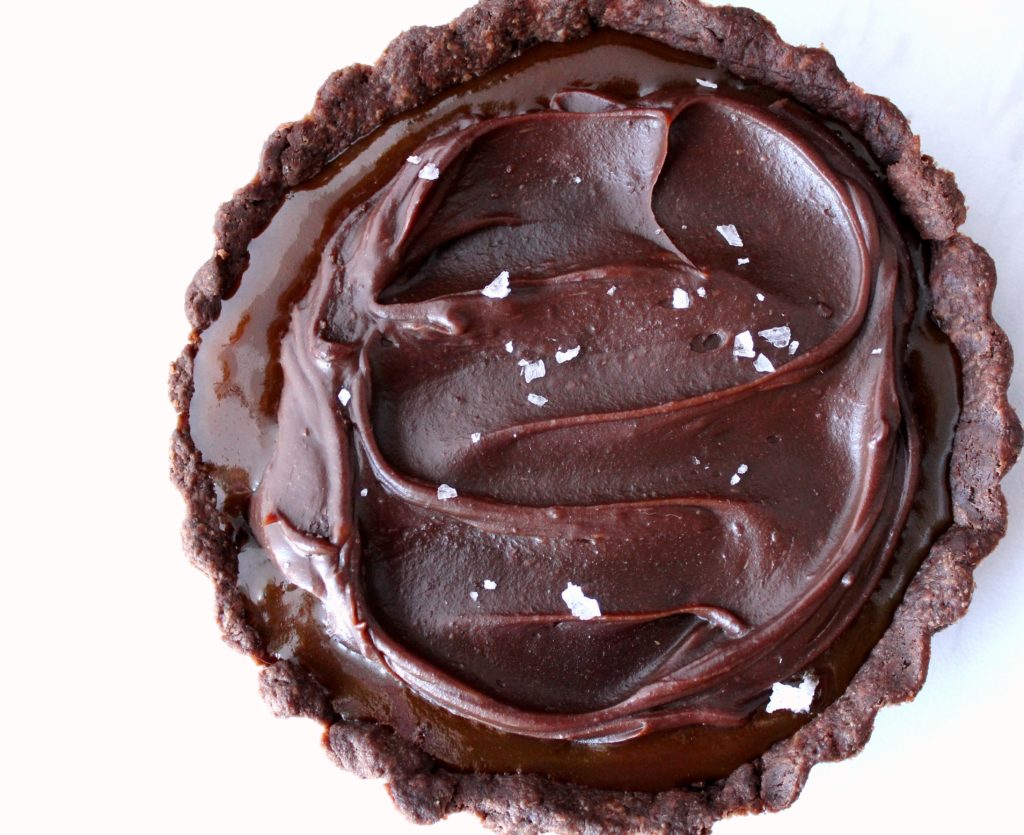
- Remove tarts from refrigerator spoon ganache on top of the caramel. Using the back of a spoon, gently smooth ganache over caramel, swirling to form a decorative pattern. Sprinkle with flaky sea salt. Allow to sit until ganache sets and looses its sheen (10-15 minutes).
Notes
Nutrition
*Recipe adapted from Bon Appetit
Some of the links on this page are affiliate links, which may pay me a small commission for my referral at no extra cost to you!
Thank you for being here! Did you make this recipe? Click on the star rating or leave a comment below. I’d love to hear how you got on. Connect with me @thefrayedapron on Instagram or Pinterest.


These tarts are beyond dreamy! Worthy to impress any guest, make them for a dinner party. A perfect dessert for a special occasion or that special person. The chocolate experience is one you will remember.
So rich, right?! I definitely caught myself red handed with fridge door open taking giant bites one night before bed.